Starry Wisdom

Entropic Words from Neilathotep

Monday, August 16, 2010

A tomato adventure!

This weekend my CSA, Eatwell Farm, had a tomato sauce party. They invited members over to the farm (in Dixon, CA) to make and can tomato sauce from tomatoes that were too ripe to send down the road to SF, and to camp out. Mackenzie and I had been to the farm in May for Strawberry picking, but we had never spent the night before (this was the second campout of the year, the first, a garlic party, was on her birthday weekend), so we didn’t know exactly what to expect. Still, it seemed like fun, so I signed us up for it.

Armed with pots, pans, knives, and a borrowed propane stove, we drove out to the farm, arriving fashionably late. Some people, who got there when the event began at 11am, were nearly finished for the day by the time we showed up at 2PM! No matter, it was a race and not a sprint for us, as we were spending the night. We cooked up an initial sauce, which ended up only filling one of my jars, but when that couldn’t fill up all of the canning jars I brought, we used the leftover to create the starting point of a second sauce. We ended up having to make a third, smaller batch, to eat with dinner that night. It was certainly a learning experience as I only ever made sauce from fresh tomatoes once before, when I roasted the heck out of some romas and then ground them in a Moulinex (note to self, bring that next time!).

After we finished up the sauce and got in line for canning (they had several pressure canners set up, but as some people made entire flats of mason jars of sauce, there was quite a wait to actually get on the stove, we ate some pasta and sauce for dinner. Bread would have been nice, as you use the same ingredients to make buschetta as tomato sauce, and there was bountiful garlic, tomatoes and basil. And after dinner we were given a tour of their amazing earthen roofed farmhouse, which is under construction. We even got to climb to the top of the roof!

After the tour, when we were packing the cooking utensils back in the car, a woman came up to us and asked if we lived on Lily St, which happens to be the street I live on. I said I did, and looked at her quizzically, and she told us that she too lives on Lily. She had noticed us packing the car this morning (and I guess I sort of noticed them too, but didn’t make a big memory of it) and Mackenzie’s neon sneakers keyed her in to the fact that we were the same people. So strangely, I drove 100 miles and managed to meet some neighbors! And even crazier, my jars and theirs were combined into one batch for the pressure canner through somewhat random chance!

After a remarkably good nights sleep for lying on the ground, we were treated to a breakfast of the best flour tortillas I’ve ever eaten, and the farm’s delicious, FRESH, eggs from their pastured chickens. These eggs are super delicious, and I highly recommend them (they have them at Rainbow sometimes, for the SF locals). When breakfast was over we went on a farm tour, and were given free reign to pick strawberries, eggplants and zucchini blossom from some over abundant (or soon to be shredded for chicken feed) fields. We snagged some strawberries and eggplants, and head out to Davis to see Mackenzie’s Sister and her family for lunch.

All in all it was a pretty great adventure, and I didn’t even mention the kitchen cart trial that was the reason that we showed up late until the end.

posted by neil at 10:31 pm
under adventure,cooking,rambling  

Saturday, July 10, 2010

Mack’s *AWESOME* Fruit Tart

A fruit tart has 4 basic parts:

1) Crust
2) Custard
3) Fruit
4) Glaze

My girlfriend Mackenzie recently made a fantastic, no, *#$%ing awesome fruit tart, using a mixture of various recipes for 3 of the 4 parts above. The fruit, of course, was baked by nature.

The impetus for this was a birthday dinner for a friend of ours, and Mackenzie volunteered to bring a dessert. The original plan was a chocolate based dessert on a graham cracker crust that she had made previously, but research showed that our friend preferred fruit based desserts. This, coupled with a fantastic recipe for a coconut pudding that we found to use up the rest of a can of coconut milk that we used in a curry recipe, lead to the recipe transcribed below.

For the Crust:

From Giada De Laurentis

9 graham crackers (5½ oz total)
2 tbsp shredded coconut
5½ tbsp unstalted butter at room temperature, cut into ½ inch pieces, plus extra for coating the pan
  1. Preheat oven to 350° F.
  2. Butter the bottom and sides of a 9 inch springform or tart pan
  3. Place the graham crackers and coconut in the bowl of a food processor. Process until the mixture forms fine crumbs, 15 to 20 seconds. Add the butter and pulse until incorporated. Press the crumb mixture into the bottom of the prepared pan.
  4. Bake for 12 minutes. Cool to room temperature, about 20 minutes

For the Custard:

From America’s Test Kitchen Cooking for Two 2010

3 tbsp sugar
1½ tbsp cornstarch
pinch salt
1¼ cup coconut milk (light or regular)
1 large egg

Note – this can refrigerated in an air tight container for up to 2 days.

  1. Whisk the sugar, cornstarch and salt together in a small saucepan. Slowly whisk in the coconut milk and then the egg.
  2. Bring the mixture to a simmer over medium-high heat, whisking gently but constantly and scraping the bottom and sides of the pan. Reduce the heat to medium and continue to cook, stirring constantly, until the pudding is thick and coats the back of a spoon – 1 or 2 minutes longer.
  3. Strain the pudding through a fine mesh strainer into a bowl, scraping the inside of the strainer with a rubber spatula to pass the pudding through. Serve warm or cover with plastic wrap, pressing the wrap onto the surface of the pudding, and refrigerate until cool, about 3 hours. Stir genly before serving.

For the Fruit:

The fruit is kiwi, raspberries, peaches, strawberries and blueberries. You’re going to have to estimate this yourself, there are no exact measurements. This image will serve as a template, however:

For the Glaze:

The glaze is a tricky bit. I will detail here the glaze that Mackenzie actually used, but I will also provide a recipe for one that we feel might be more appropriate as it would have a thinner consistency and be easier to apply.

The glaze used, from cooks.com:

1 cup apricot juice
1½ cup sugar
  1. In a heavy saucepan, boil down the syrup until thick. Let cool for 5 mins so it is warm, but not hot to the touch.

Alternate recipe from joyofbaking.com:

½ cup apricot jam or preserves (125 grams)
1 tbsp Grand Marnier or water (can also use other liqueurs)
  1. Heat the apricot jam or preserves and water (if using) in a small saucepan over medium heat until liquid (melted).
  2. Remove from heat and strain the jam through a fine strainer to remove any fruit lumps. (If using, add the liqueur at this point.)
  3. Let cool until it is only slightly warm.

To assemble the tart:

  1. Prepare the crust and custard detailed above. Wash and slice the fruit as appropriate. Make the glaze as detailed above.
  2. Spread the custard on the crust in an even layer.
  3. Lay out the fruit as desired on top of the custard.
  4. If using the first glaze recipe: spoon over tart, being careful not to create deep wells of glaze. Do not try to brush or spread as it will be quite sticky and will disrupt the fruit. The glaze can also be used to glue some fruit pieces (such as the peaches) down.
  5. If using the alternate glaze recipe: gently brush the glaze onto the fruit with a pastry brush.
  6. Refrigerate until well chilled
posted by neil at 11:47 am
under cooking  

Saturday, May 8, 2010

Fava Beans

Fava beans are pretty silly. Did you know that?

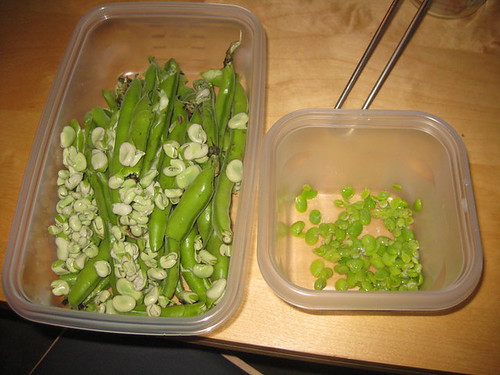
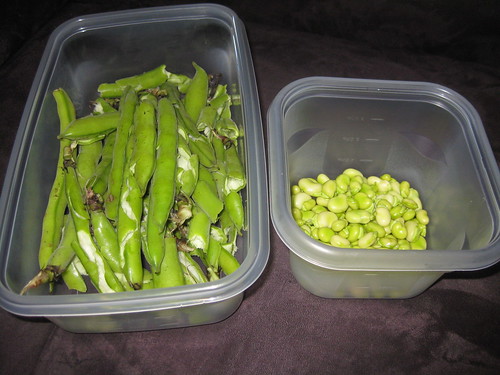
To prepare them, first you get the pale green beans out of the big fuzzy pods – you get relatively few from a big bunch of pods:

So you look at that and think “well, maybe that’s not so bad. But it turns out that those pale green beans are really tasty bright green beans in a pretty much inedible pale shell. And to get them out you need to boil the beans for about 5 minutes, then cool them in cold water, and then peal them. And next you get an even smaller amount of food:

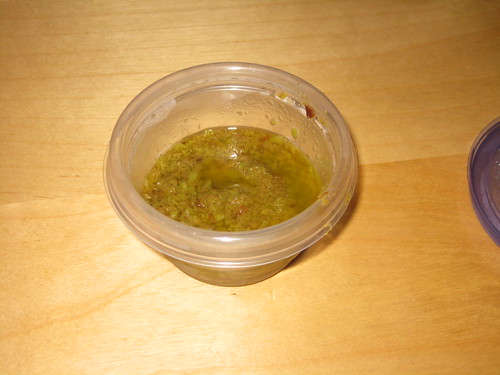
Well, now you can start making your recipe. Here is one I like a lot:

Fava Bean Spread
(From Vegetables Everyday by Jack Bishop)

  • 1 lb of fava beans, unshelled
  • 1 small spring onion, minced
  • 1/8 cup olive oil
  • 1/8 cup water

1) Prepare the beans as secribed above
2) Heat a skillet over medium heat. Add the oil and saute the onion until browned, about 5 minutes
3) Add the beans and salt to taste. Toss the beans to coat with oil. Add water, and simmer uncovered for 3-5 minutes until the beans are tender.
4) Add the cooked mixture to a food processor and pulse until it forms a coarse paste, adding additional olive oil as needed

Spread over bread or crostini.

posted by neil at 10:12 pm
under cooking  

Monday, March 15, 2010

Sriracha Wings!

Yesterday I tried my hands at hot wings. This was in preparation for an event later this month where I intend to bring some of the wings, but I figured I should try them out myself first! I based the recipe on the one from Good Eats, but I changed the sauce a bit to use Sriracha as the heat component. I did this mostly because I like the taste, but it had the added bonus of creating a sauce that was thicker than the standard buffalo sauce and therefore more of it adhered to the wings.

Sriracha Hot Wings:

12 entire chicken wings
3 ounces (6 tbsp) unsalted butter
2 cloves garlic, finely minced
~1/4 cup Sriracha – more or less depending on how spicy and/or thick you want the sauce to be

1) Cut the tips off the wings, and then seperate into and drumettes and wingettes.
2) Heat 1 inch of water to a boil in a large pot. Spread the wings out in a steamer basket (or make the multi stacked one Alton Brown made in the episode “The Wing and I”. Place the basket into the pot, cover and let steam for 10 minutes. This step renders out a lot of the fat.
3) Pat the wings dry, carefully, with paper towel, and spread out on a cooling rack on top of a paper towel lines half sheet pan. Place the wings into the refrigerator for not less than one hour and up to 24 hours.
4) Preheat the oven to 425 degrees F. Replace the paper towel lining with parchment paper, and roast the wings for 20 minutes. Flip the wings over and roast 20 minutes more.
5) Melt the butter in the microwave along with the garlic. Put the melted butter and garlic mixture into a large bowl and then stir in the Sriracha.
6) Immediately after taking them from the oven, place the wings in the bowl and toss to coat. Serve warm.

That’s it, simple as can be. I will admit that I did a partial recipe for the test run, but it’s pretty easy to scale the sauce as you see fit for the amount of wings you are serving.

posted by neil at 11:00 pm
under cooking  

Sunday, February 28, 2010

What do you do with a bag of turnips?

After a fairly long hiatus, I’ve rejoined the CSA (well, I’m splitting it with Mackenzie – and we’ve changed the pickup to the place near her apartment since it has much better hours than the one 2 blocks from me – but which is inaccessible to someone who works normal business hours). I’ve been eating a lot more vegetables since rejoining, which is good, and I’ve also been cooking a bit more.

It being winter, turnips are in season, so we’ve been getting them in every box. Until recently they were small salad turnips, which are nice because you can eat them raw OR cooked, but those are now grown up to bigger cooking turnips. But this begs the question – how do you cook a turnip? I’d like to provide a simple, delicious recipe:

Maple Braised Turnips
Serves 2-4 as a side dish
(Adapted from Vegetables Everyday by Jack Bishop)

note: the original recipe was half carrots and half turnips – feel free to substitute carrots back in, or replace the turnips with them completely – however the carrots do not need to be browned before the simmering)

1/2 tablespoon unsalted butter
3/4 lb turnips peeled and cut into 3/4 inch cubes
1/3 cup chicken or vegetable stock
1 tablespoon maple syrup
Salt
Freshly ground pepper

1. Melt the butter in a large saute pan. Add the turnips and cook, turning occasionally until lightly browned (about 8 minutes).
2. Add the carrots, stock, maple syrup, and salt and pepper to taste. Cover the pan, reduce the heat, and simmer until soft, about 20 minutes
3. Remove the cover, raise the heat to high, and cook until the liquid in the pan reduces to a thick glaze, about 2 minutes.

I thought I had a picture of this, but alas, my camera says NO.

posted by neil at 11:33 pm
under cooking,food  

Sunday, September 6, 2009

Pine Mouth and Me

Two weeks ago, on August 22, I had people over for dinner. I made this recipe for the Zuni Cafe roasted chicken with bread salad. The recipe/dinner itself would almost be worthy for a post in and of itself, but as you can see, Deb has already well explained the recipe, and I have something more important to talk about – Pine Mouth. I know, you are probably thinking “what the heck is pine mouth?” I would be saying the exact same thing in your shoes, if I didn’t have the unfortunate experience myself.

I suppose it makes the most sense for me to explain this by way of a timeline, and fill in the information as I learned of it.

Tuesday August 25, 2009 – I woke up for work (I work from home Tuesday mornings), and while I was brewing the coffee, I grabbed a gum drop from a plastic bin as a snack. It tasted a bit strange to me, extra bitter, but I thought maybe it was just a bad gum drop, and didn’t think much of it. The coffee, prepared in a Moka pot, also tasted a bit bitter, but I thought I had burned it some, and just kind of powered through. Neither of these tastes really made me think anything was wrong, but after I got to the office around 11, I noticed that there was a persistent foul taste in my mouth – a acrid, sour taste. I thought maybe I was having some reflux, not completely unheard of for me, so I had a Tums, which also tasted completely awful. When 30 minutes later the taste didn’t go away – in fact it was hanging there like a bitter blanket on the back of my tongue, I started to get concerned. So I did what any sane person would do, and I googled “bitter taste on back of tongue”, and found a bunch of very concerning articles – was my liver failing? Did I actually have a brain tumor? However, thankfully, I noticed, far down on the page, a reference to pine nuts causing a bitter taste. “I had pine nuts Sunday in the bread salad, in fact I had a bunch while cooking dinner too…” was in my mind.

I did some more googling around, and found that wikipedia contains a reference to this outcome, as well as a link to a paper in the European Journal of Emergency Medicine describing this affliction. Interestingly enough, the paper is from 2001, but most of the 13,000 hits for “Pine Mouth” seem to be from the past 9 months or so. So what’s going on here? Well, no one knows, but I will talk about what’s known:

  1. Around two days after eating certain pine nuts, certain people develop a lingering, unpleasant taste sensation
  2. The pine nuts that have caused the issue appear to be mostly sourced from China, or other places in the East. European and American pine nuts appear to be precluded from causing this, for now
  3. The exact methodology of this affliction is not known (but I will discuss a hypothesis of mine shortly
  4. The affliction lasts for about one to two weeks for more people

Seeing this all relieved me greatly, and also caused me to realize that the bitter taste was reminiscent of the bitter component to pine nuts’ flavor. I made it through the rest of the day eating food that tasted poorly, and just suffered.

Wednesday August 26, 2009 – This mostly probably the worst day of the experience taste wise, because everything I put in my mouth, save for water, tasted like it was coated in dish soap. I was also a bit concerned by getting affected now (and note that none of the other 3 people at dinner got hit by this, so perhaps my extra snacking before dinner helped this along), since I had plans to go wine tasting in Napa the coming weekend with Mackenzie, and what’s the point in wine tasting if all the wine tastes like soap!?

Thursday August 27, 2009 – The soap taste had receded a bit. It was now more of an aftertaste (and a most foul one at that), and I found that some foods had strong after tastes than others. In particular high carb/high sugar foods were the soapiest, and spicy and savory items were markedly less so. I had some hope that by the coming Saturday I would be “better”.

Saturday August 29, 2009 – Sadly, I wasn’t all the way better by Saturday. The soapy aftertaste was certainly less strong, and it lingered far less, but my taste was still not up to par. I couldn’t trust any aftertaste in any of the wines I tasted (and, alas, port in particular was fouled by the soapy aftertaste, which made my otherwise fun visit to Prager Port imperfect.

Wednesday September 2, 2009 – After brushing my teeth in the morning I thought to myself “hey, was this baking soda tooth paste”, because it had that sort of aftertaste. It was not, just normal minty stuff, but this also the last little whisper of the Pine Mouth distastefulness. I was, after this, free at last!

So it lasted a bit more than 8 days for me, which seems to be right around the average, but the big questions remain – what the heck is this, how does it work? Of course, I can’t answer everything, but I can say that scraping your tongue, eating things like parsley, etc have no impact on this. It’s something inside (or chemically bonded) to your taste buds which causes this. And, I think this is the key to the one to two week duration – the life span to a taste bud is about two weeks. So, I, hypothesize that some chemical in these pine nuts from China or Korea or etc, binds with the taste receptors in some taste buds, and then over the course of 36 or 48 hours, metabolizes into some other chemical that blocks all taste except bitter, and perhaps even generates this taste. Now, as these afflicted taste buds die off over the next two weeks, your taste gradually returns to normal.

That’s my story with Pine Mouth. I’m going to be hesitant to eat pine nuts sourced from Asia again, but I’m not going to completely avoid them. It’s entirely possible I will never face this again (and I hope so), but at least I’ll know what it is next time. Have you ever had pine mouth? What was your experience like? Let me know!

posted by neil at 12:42 pm
under cooking,emo,food,rambling  

Saturday, June 27, 2009

Apricot Liqueur

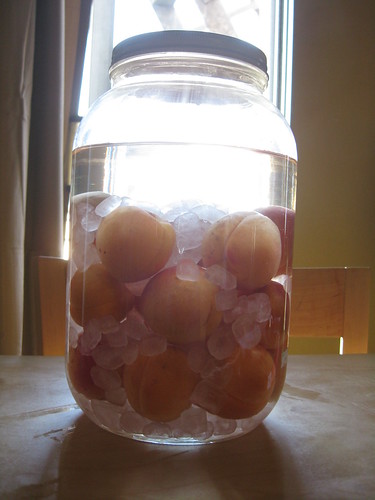
Much like my plum liqueur from last year, I’ve prepared a modified Umeshu.

This consists of 1kg of apricots (organically grown in Brentwood!), 750g of rock sugar and 1.5L of shochu (basically 50 proof grain alochol from Japan). It’ll be ready in 6 months to a year.

posted by neil at 6:35 pm
under cooking  

Sunday, June 21, 2009

Parmesan-Rosemary Biscuits

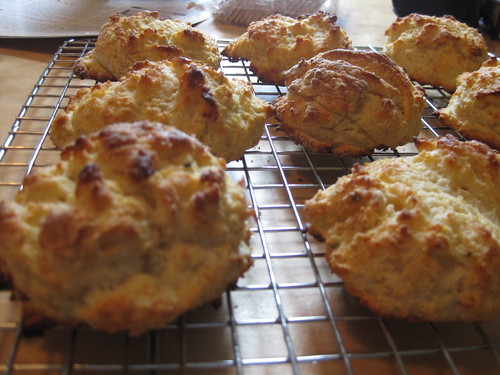
This recipe is for a savory variety of biscuits. You can easily make it a less savory biscuit simply by not adding the parmesan and rosemary. It’s a very simple recipe and pretty much makes serving biscuits out of a tube ridiculous!

Parmesan-Rosemary Biscuits
Courtesy Cook’s Illustrated, Issue 89

makes 12 biscuits

  • 2 cups (10 oz) unbleached all-purpose flour
  • 2 teaspoons baking powder
  • ½ teaspoon baking soda
  • 1 teaspoon sugar
  • ¾ teaspoon table salt
  • ¾ cup (1½ oz) grated Parmesan cheese
  • ½ teaspoon finely minced fresh rosemary leaves
  • 1 cup cold buttermilk
  • 8 tablespoons unsalted butter, melted and cooled 5 minutes, plus 2 tablespoons melted butter for brushing biscuits
  1. Adjust oven rack to middle position and preheat to 475. Whisk flour, baking powder, baking soda, sugar, salt, cheese and rosemary in large bowl. Combine buttermilk and 8 tablespoons butter in medium bow, stirring until butter forms small clumps.
  2. Add buttermilk mixture to dry ingredients and stir with rubber spatula until just incorporated and batter pulls away from the side of the bowl. Using greased ¼ cup dry measure (or #16 disher) scoop level amounts of batter onto parchment-lined baking sheet. Repeat with remaining batter, spacing biscuits 1½ inches apart. Bake until tops are golden brown and crisp, 12 to 14 minutes.
  3. Brush biscuit tops with reamining 2 tablespoons melted butter. Transfer to wire rack and let cool 5 minutes before serving.
  4. To refresh day old biscuits, heat them in a 300-degree oven for 10 minutes.
posted by neil at 11:16 am
under cooking  

Sunday, May 24, 2009

Hummus

I had people over yesterday, and one of the things I provided to eat was hummus. In general, I think it’s a great party food because almost everyone likes it (and I don’t think I want anyone who doesn’t like it at my place!), it’s healthy, and it’s actually pretty easy to make. Here is the recipe I used, which I think I grabbed from Cook’s Illustrated, but I am too lazy to go look that up, and I already had it pasted in to my email for some reason.

Note: this can easily be doubled

Restaurant Style Hummus

3 tablespoons juice from 1 to 2 lemons
1/4 cup water
6 tablespoons tahini stirred well
2 tablespoons extra-virgin olive oil
plus extra for drizzling
1 (14 ounce) can chickpeas, drained or rinsed
1 small garlic clove, minced or pressed (about 1/2 teaspoon)
1/2 teaspoon table salt
1/4 teaspoon ground cumin
pinch cayenne
1 tablespoon minced fresh cilantro or parsley leaves

  1. Combine lemon juice and water in small bowl or measuring cup. Whisk together tahini and 2 tablespoons oil in second small bowl or measuring cup. Set aside 2 tablespoons chickpeas for garnish.
  2. Process remaining chickpeas, garlic, salt, cumin, and cayenne in food processor until almost fully ground, about 15 seconds. Scrape down bowl with rubber spatula. With machine running add lemon juice-water mixture in a steady stream through feed tube. Scrape down bowl and continue to process for 1 minute. With machine running, add oil-tahini mixture in steady stream through feed tube; continue to process until hummus is smooth and creamy, about 15 seconds. Scrape down bowl as needed.
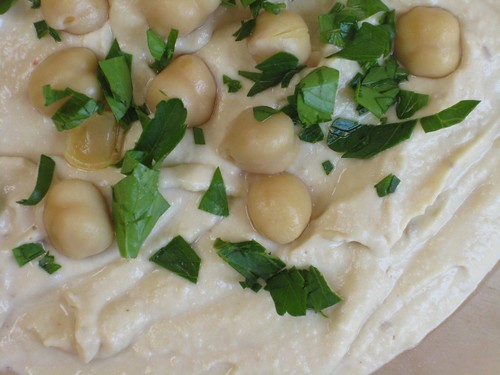
  3. Transfer hummus to serving bowl, sprinkle reserved chickpeas and cilantro/parsley over surface, cover with plastic wrap, and let stand until flavors meld, at least 30 minutes. Drizzle with olive oil and serve.
posted by neil at 12:34 pm
under cooking  

Sunday, April 26, 2009

“Umeshu”

Long time readers might remember the plum liqueur I put up last summer. I took a bit out and chilled it today, and we tasted it after dinner tonight. Quite nice, if not quite proper umeshu!

posted by neil at 8:44 pm
under cooking,food  
« Previous PageNext Page »

Powered by WordPress